

Add Google Login to your React Apps in 10 mins
As a client developer, Creating apps with authentication might be a tedious process. As we need to handle authentication in the server and maintain the code. It does have some multiple cases to be maintained based on authentication mechanisms. (Basic, OAuth, etc) This blog helps you create a standalone backend less authentication for your react app. (or additionally) you can add server configurations too to authenticate with your server.
Why OAuth?
There are many reasons to use OAuth.
- It is secure.
- It doesn’t require any credentials from the user. So no need of remembering multiple passwords.
- Websites can also get essential information about users without spending much time in forms.
And specifically in our case, we don’t need a server to authenticate or to get initial details of the user. 😉
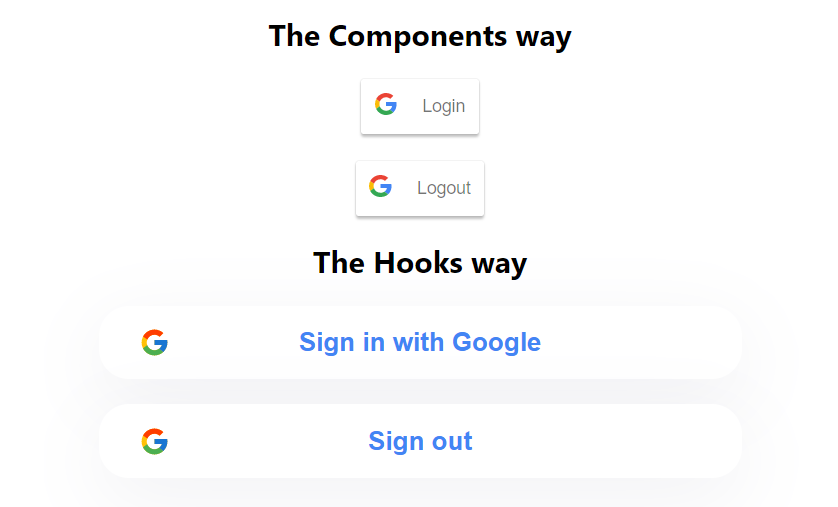
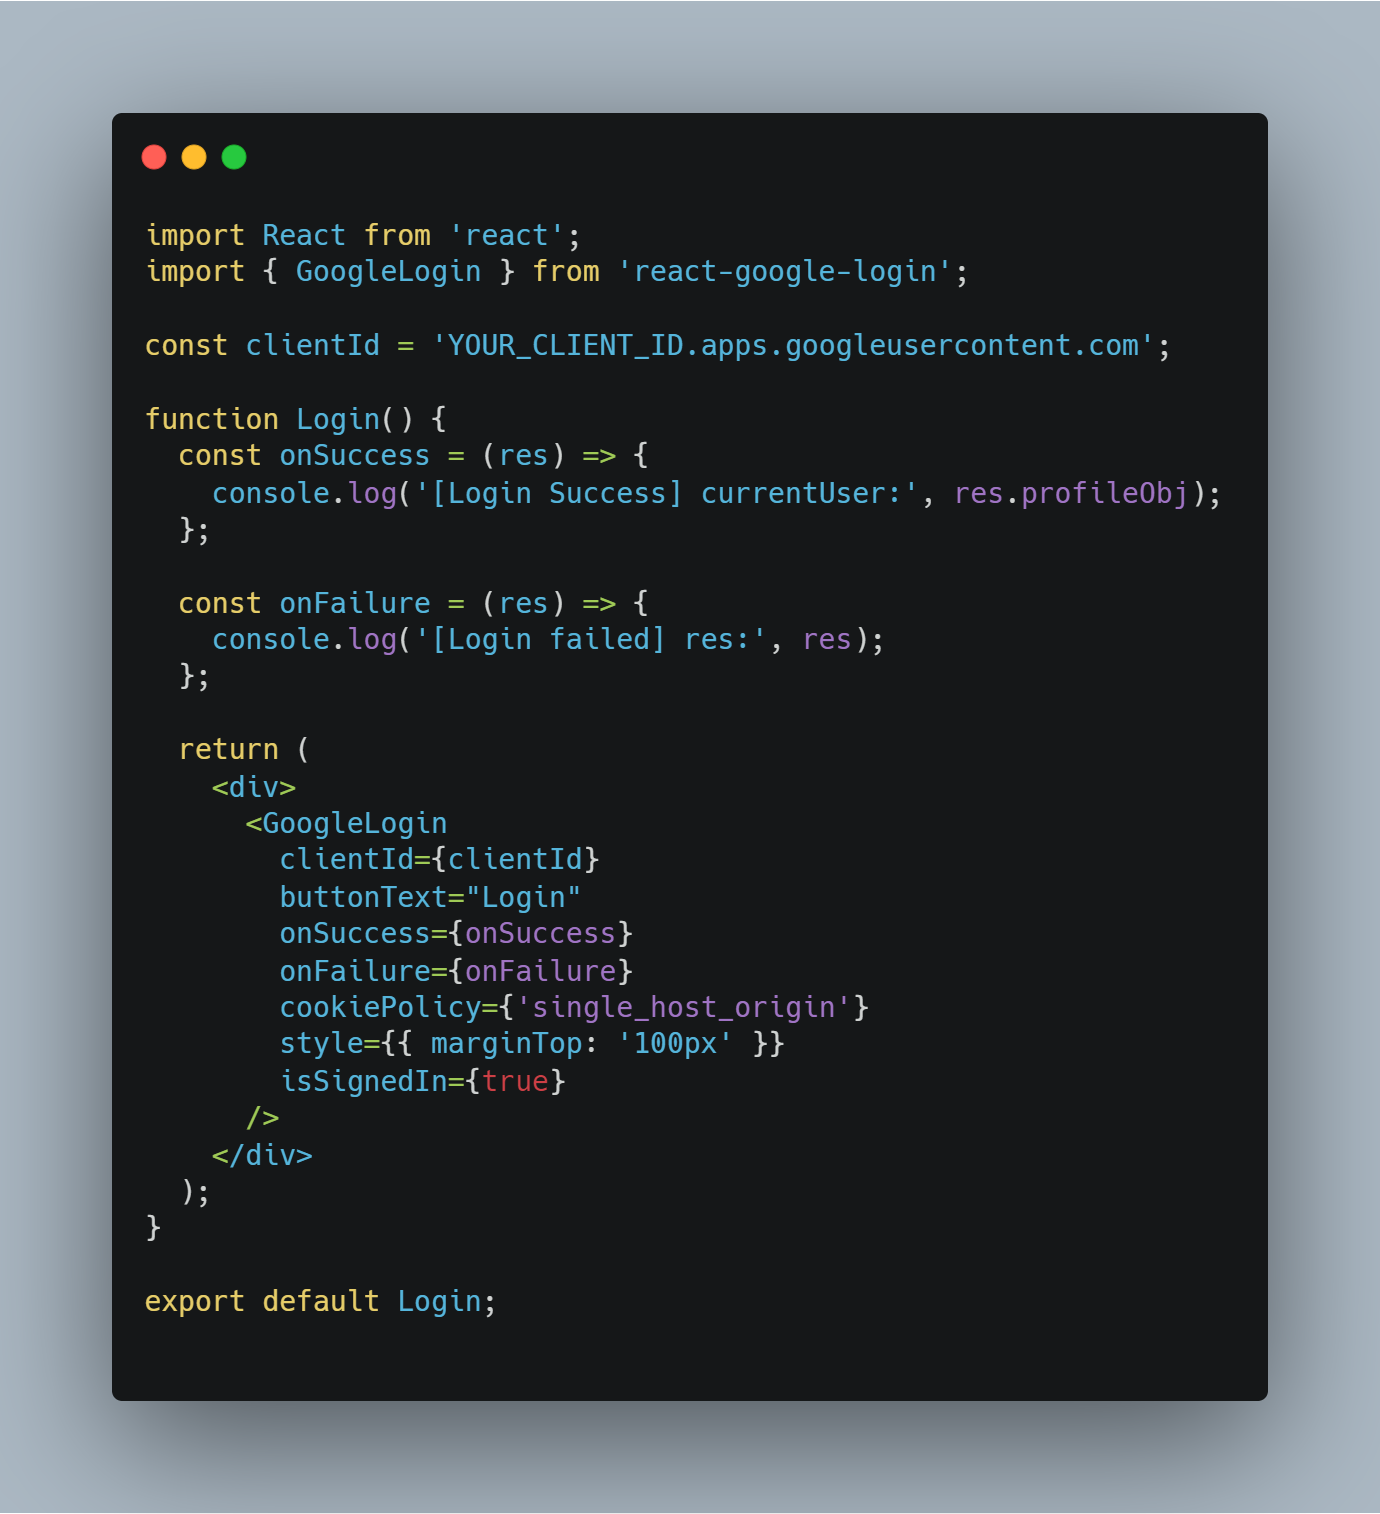
I found a package which is called as react-google-login. Which provides simple mechanisms to add the Google login. You can either directly use their GoogleLogin component or you can use custom buttons. They also provide custom hooks like useGoogleLogin and useGoogleLogout so it will be easy for hooks lovers. (Both methods are described below)
The documentation they provided for this repository is awesome. But it’s missing in some ways which are addressed in this blog. Like in detail, this blog helps in creating your application in the Google developer console and access clientId. The initial access_token obtained by this package will last for only one hour ( For security reasons). And we need to iterate the process to access the new access_token using refresh_token. So you can make a production-ready application.
Steps
We need to create an application in the Google developer console. It provides
clientIdis used to identify your application for authentication details. Follow the below steps to get the client ID.Go to the Credentials page. ( if you are new, then create a project and follow these steps)
- Click Create credentials > OAuth client ID.
- Select the Web application type.
Name your OAuth 2.0 client and click Create
Make sure you provided your domain and redirect URL. So that Google identifies the origin domain to which it can provide authentication.

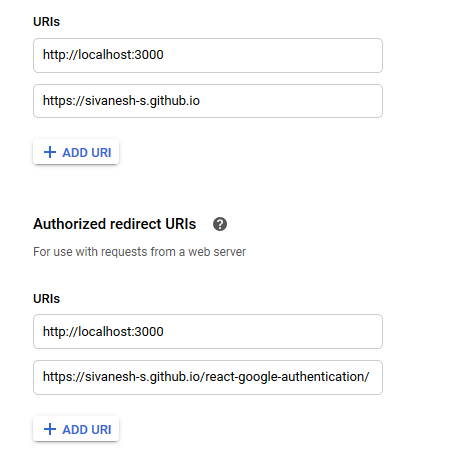
You can also add your local route for development. Now authentication setup in Google developer console is ready.
Lets code

Let’s start with code. View my repo for accessing all code snippets. View Demo.
In your CRA install react-google-login package
Create a Login component that acts as a login button.

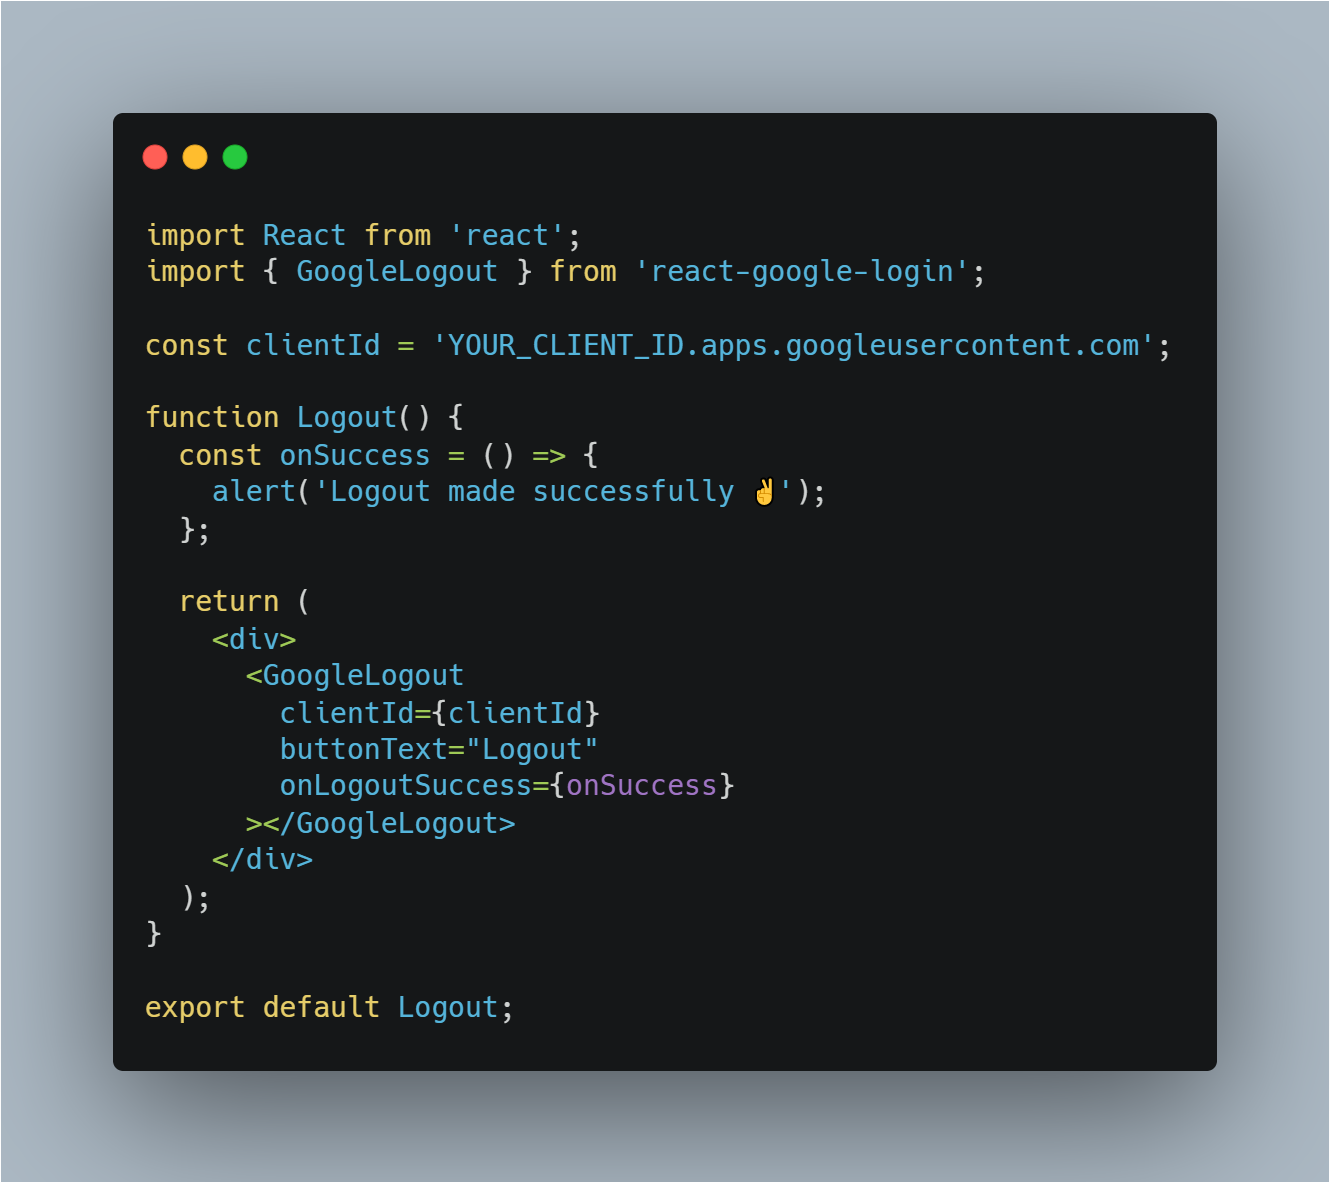
Similarly, create a Logout component

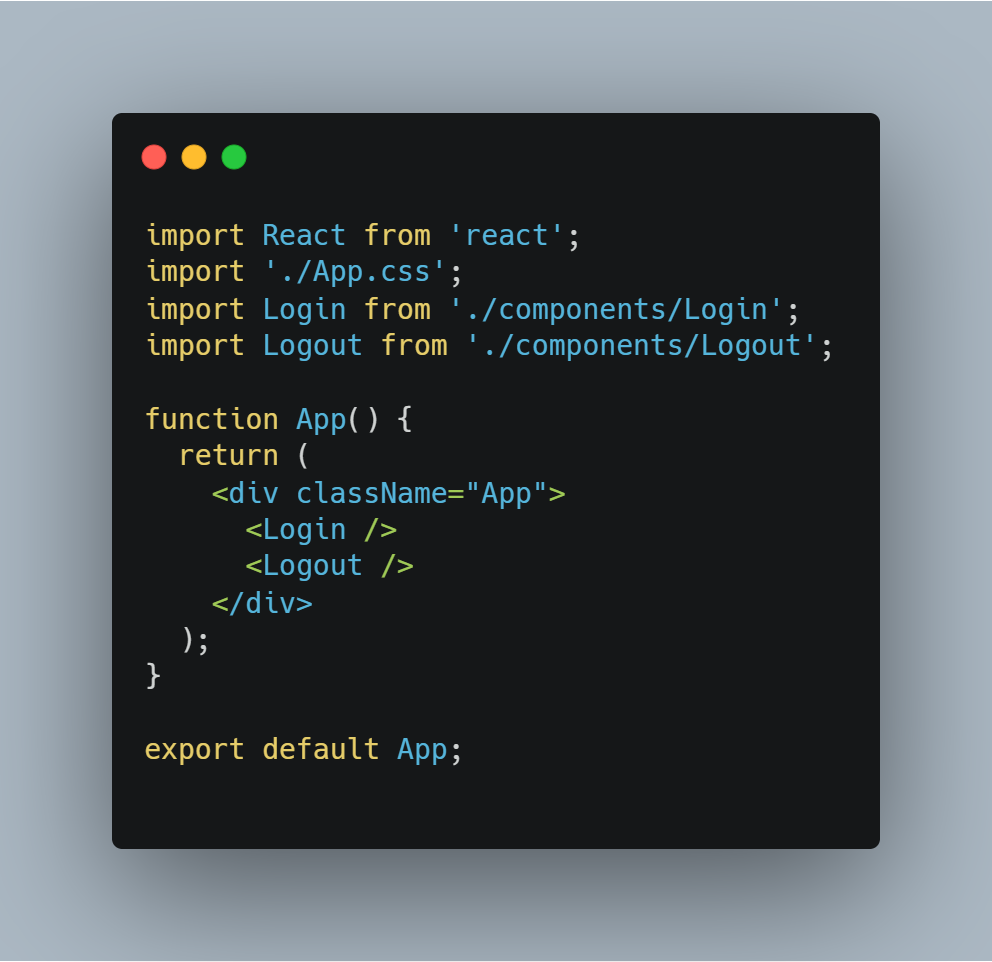
And add both in the required location of your app. Mine is in App.js

Now running your application will show profileObj in the console after logging in.
Congrats 🎉 You successfully made it 😃.
But after 1 hour your tokenId gets expired and hence it won't be used to access data or authenticate users. And hence we need to generate new tokenId. To make things work we need to make things work we have to add some additional cases in the Login component.

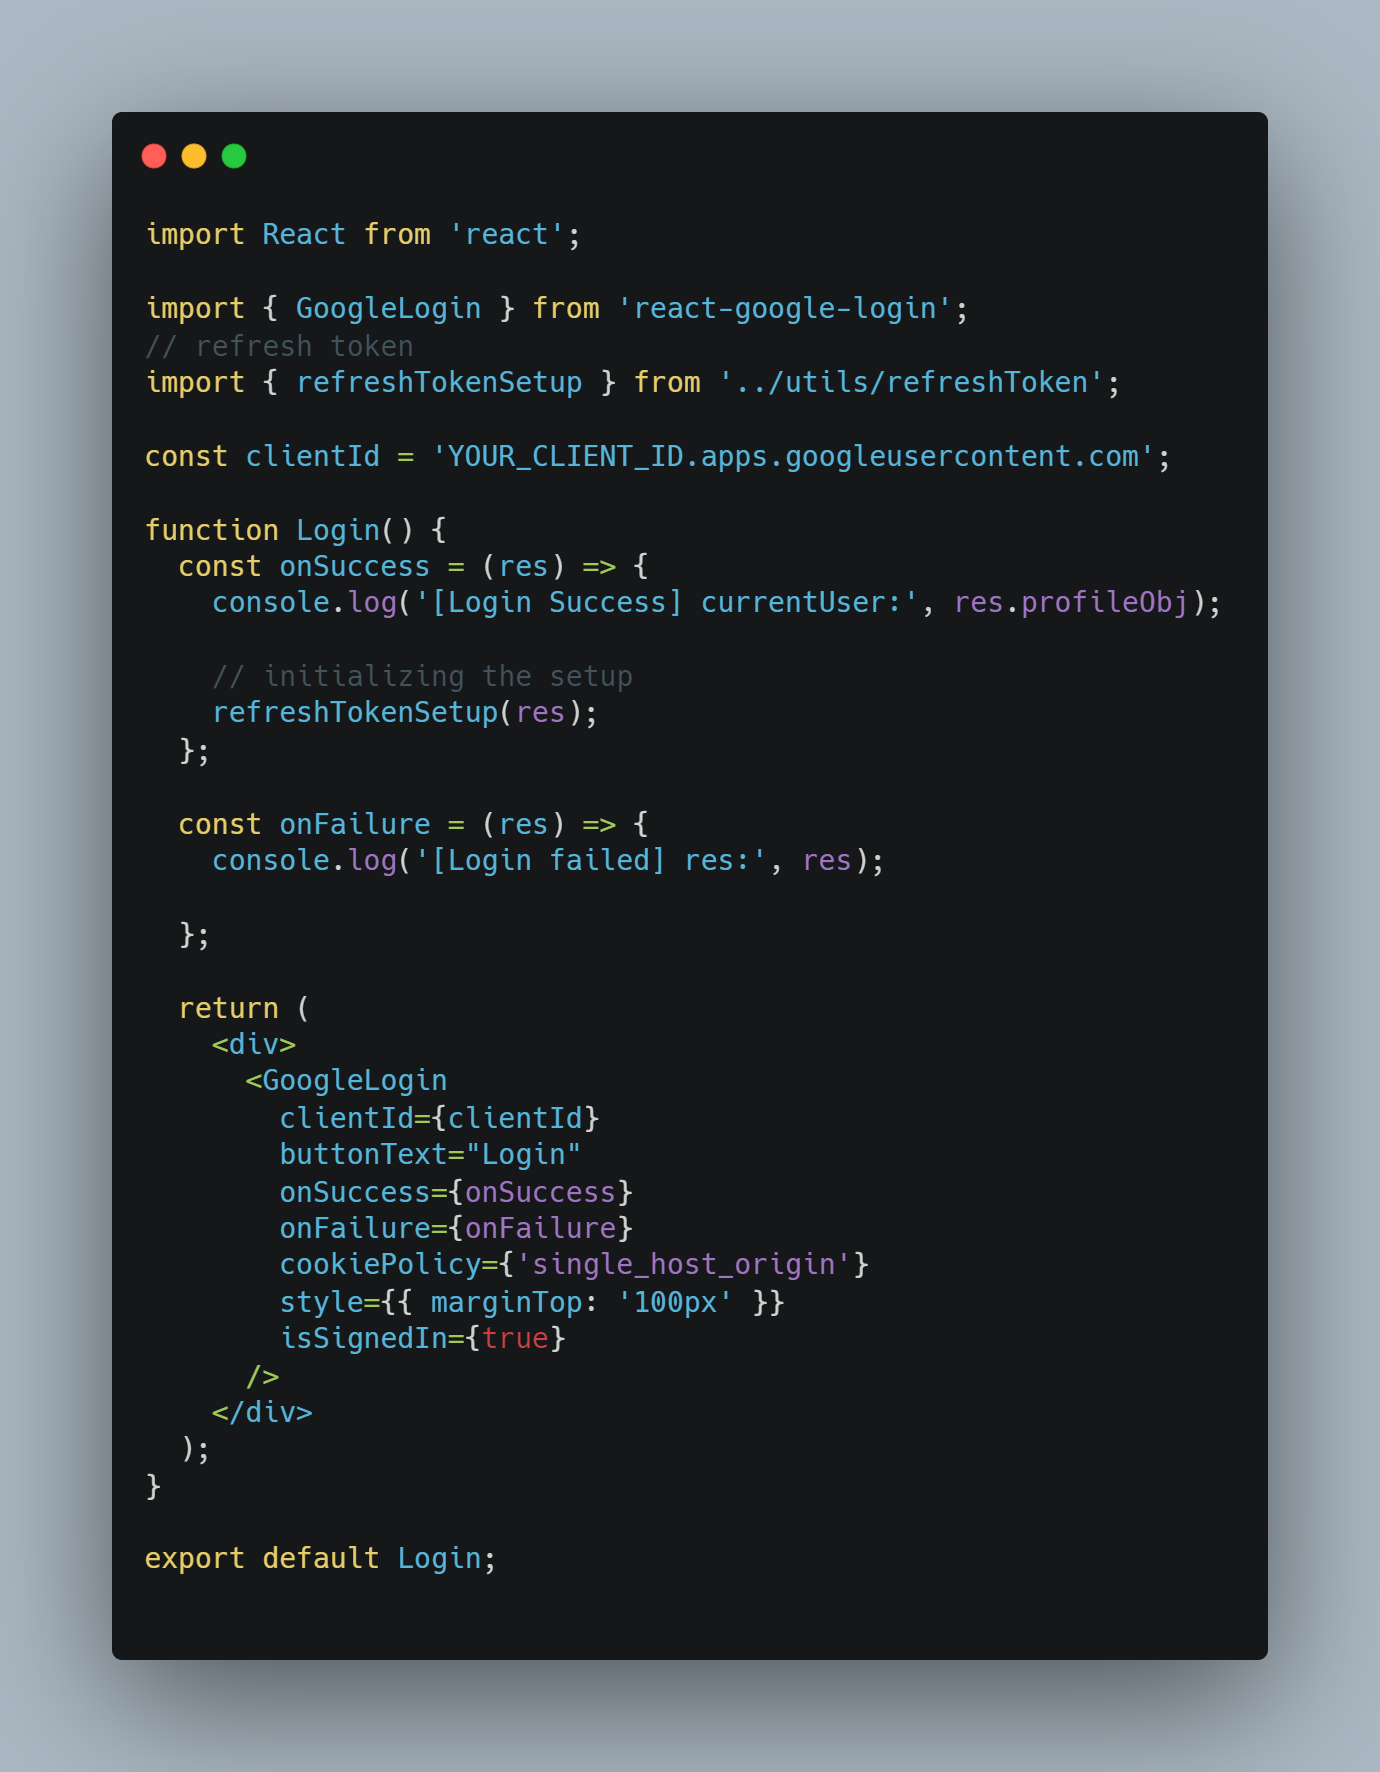
refreshTokenSetup function will take care of handling new tokenIds

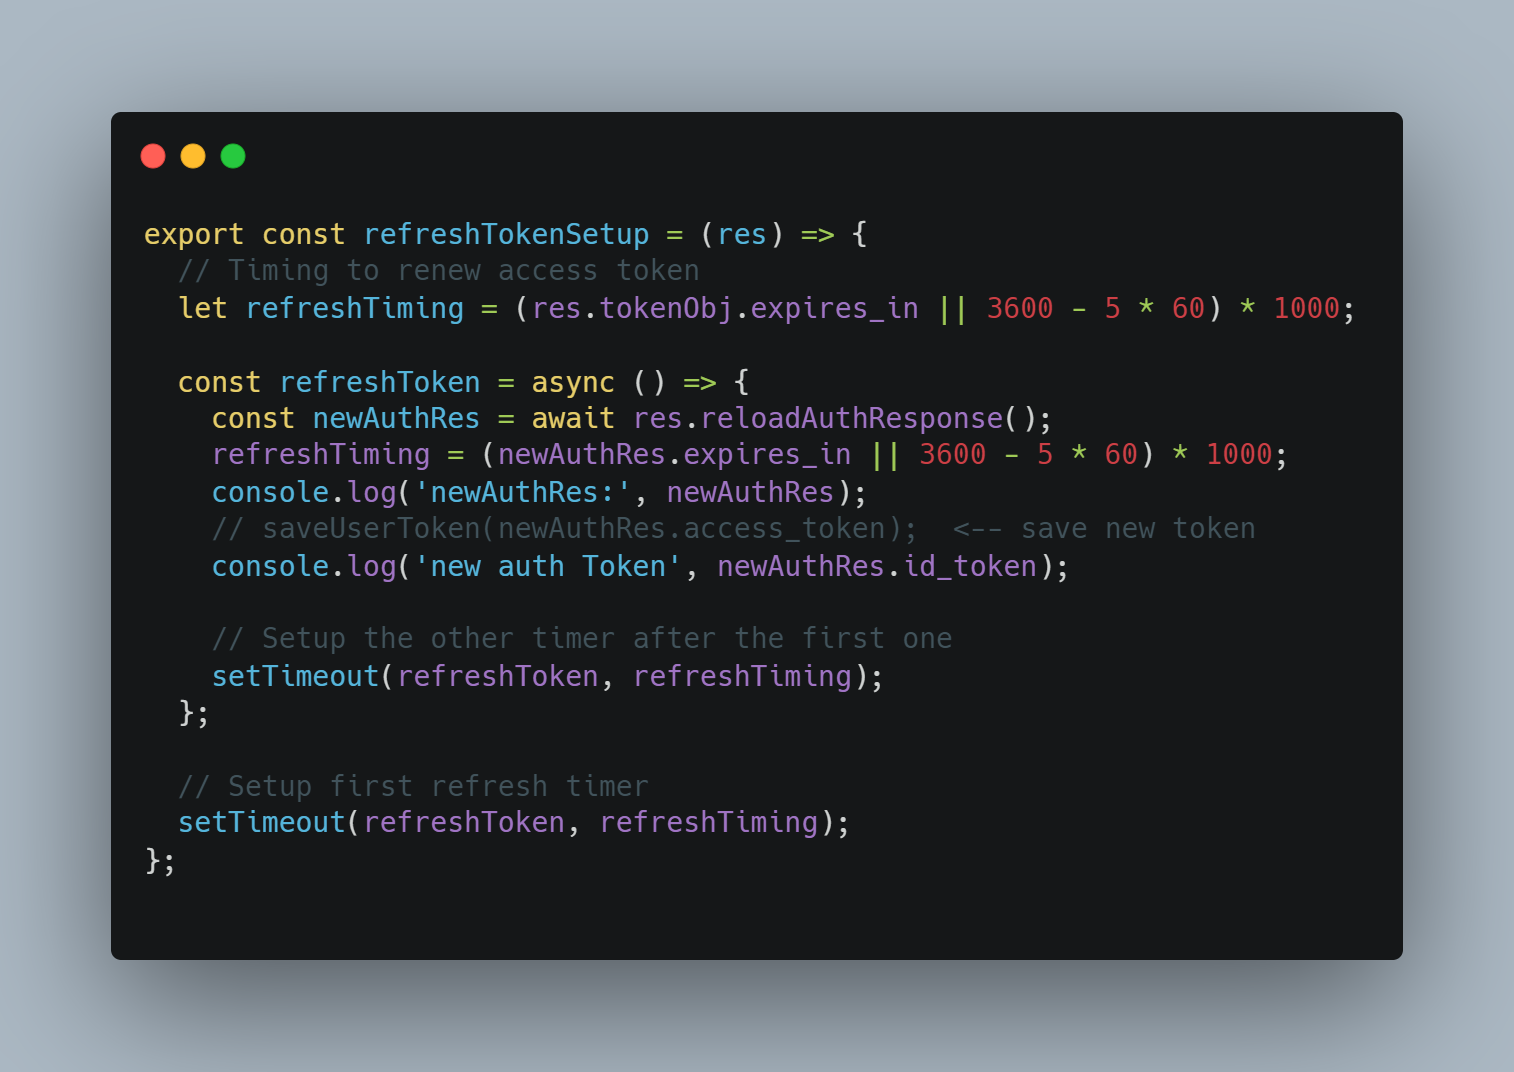
This function checks for expires_in timestamp or our custom time (before the token expires) and calls reloadAuthResponse which is a util function provided by the library and it handles refresh_token and obtains new tokenId.
And Yeah 😃 Google login is added to your application successfully 🎉. So now you can access the user’s name, photo URL, email, google Id, etc.
Additional
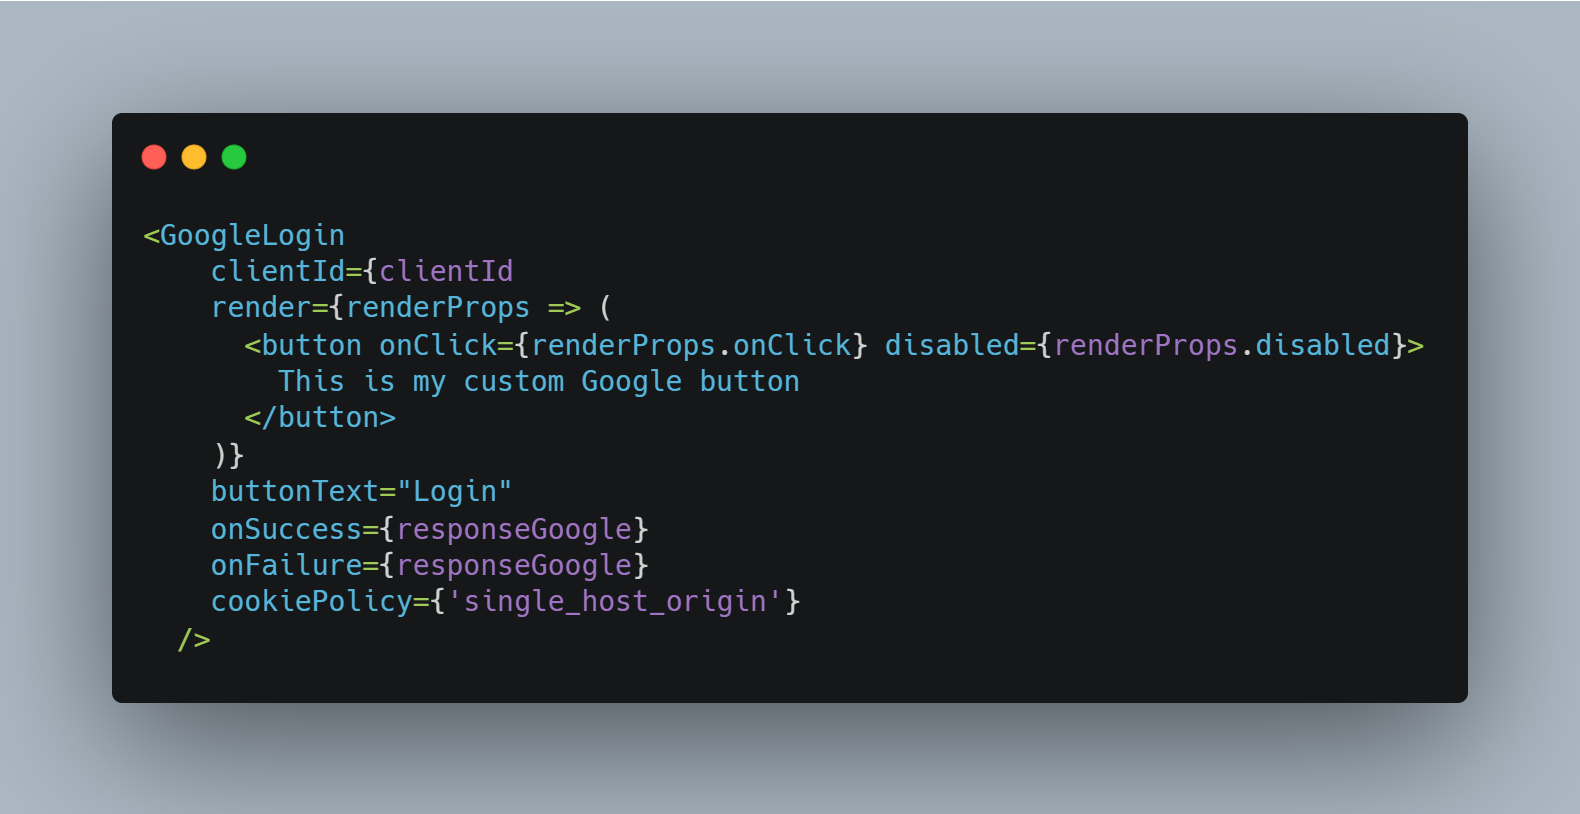
The above way uses the Google Login default button. You can also use your custom button using render prop.

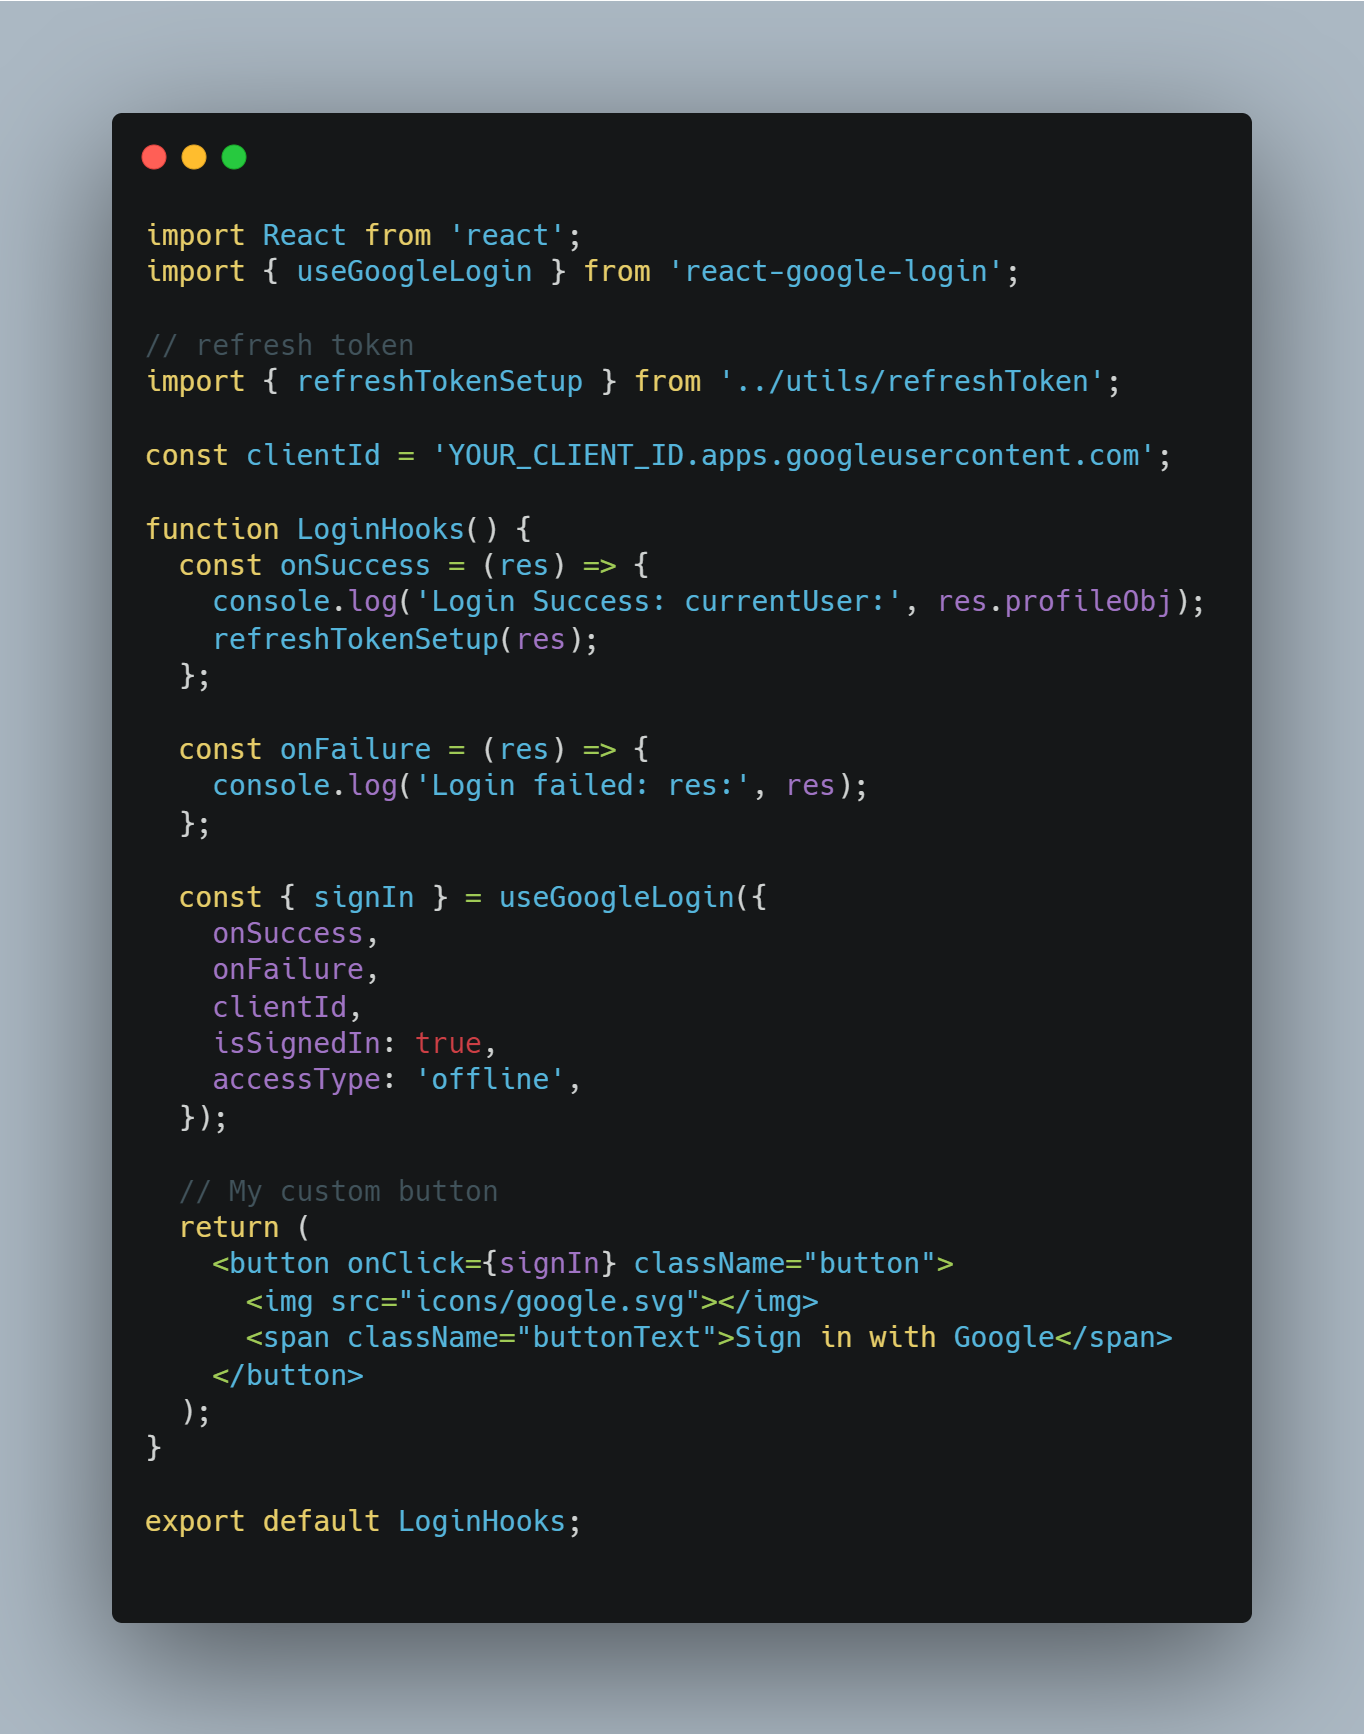
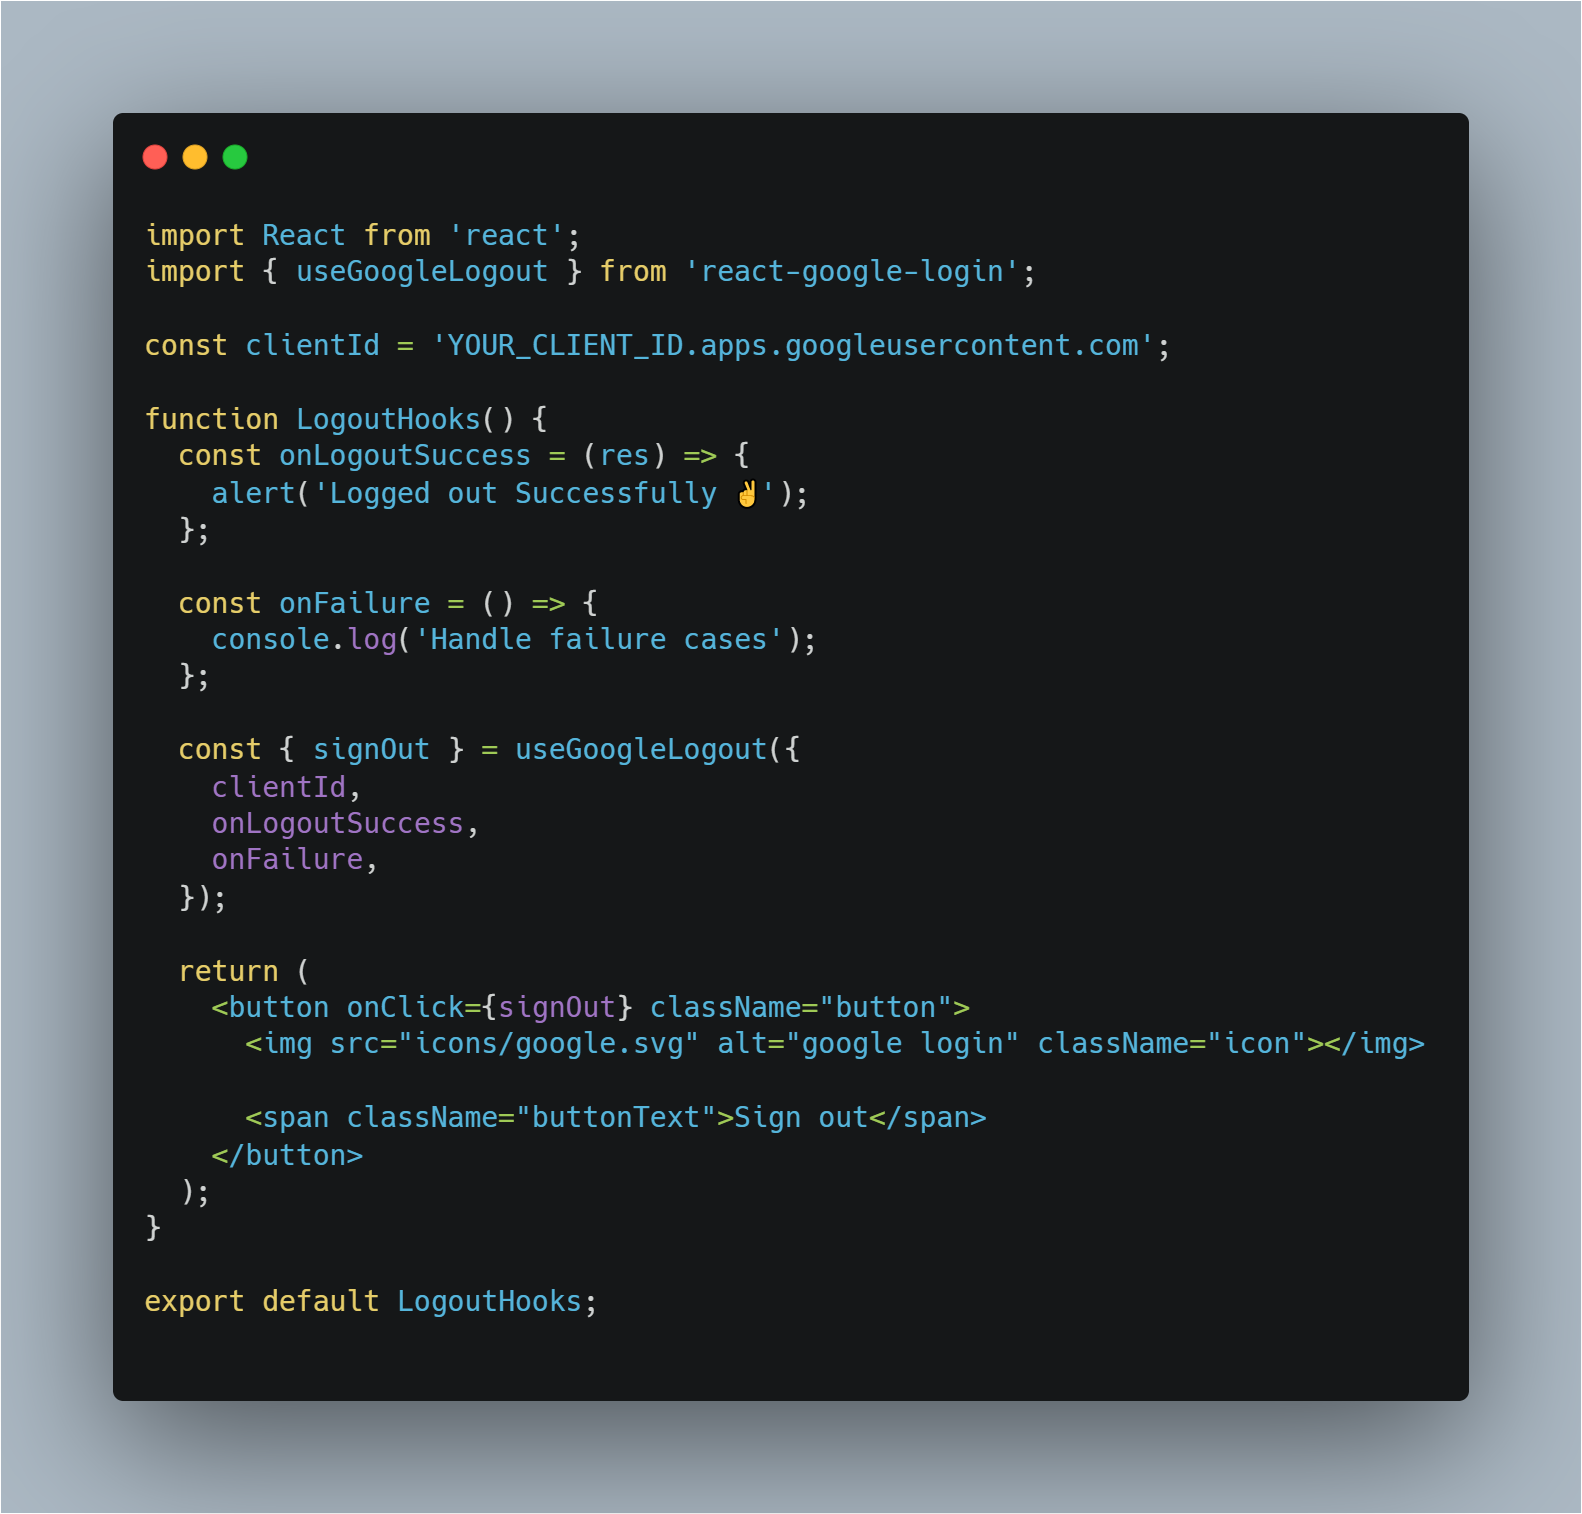
We can also implement the same functionality using React Hooks. ❤️
LoginHooks.js

LogoutHooks.js

Server-side verification
If you wish to add Server side verification, Send the tokenId from client to server once onSuccess in Login component called.
So while handling authenticated routes, All requests from the client need to send the tokenId of the user in the header as Bearer token. At Server, once token received it must be verified either this tokenId
- belongs to the current application.
- Has it expired
You can do them manually but google suggests using their authentication library (Minimal effort required).
In the Server side (Here Node.js is used).
Install Google’s official supported library google-auth-library package which is used to authenticate and verify OAuth apps.

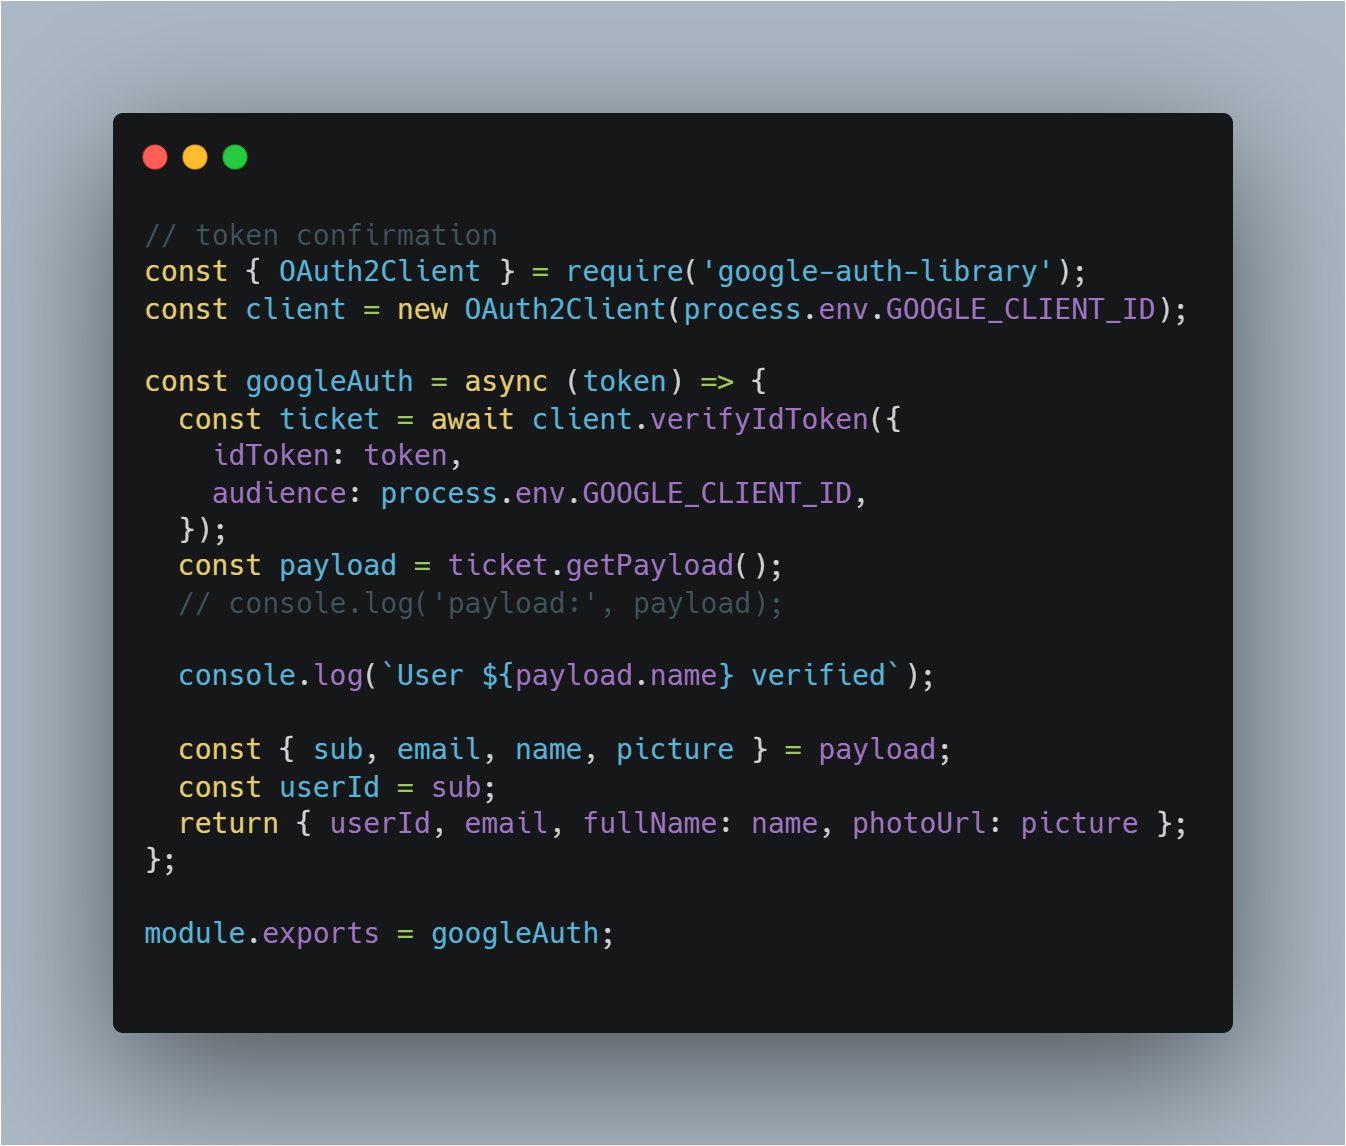
Here, With our GOOGLE_CLIENT_ID sent it verifies whether this token belongs to our application or not. And it parses them and provides profile details in the getPayload function. And you can use them to access user data.
Any queries feel free to comment or chat with me personally in my social media accounts below.
I love to be connected with developers. 😃